Deploying code to the RoboRIO
Ensure the robot is turned on, etc
Connect to the robot's radio; it will be named
4183_ROBOTNAMEwhereROBOTNAMEis, obviously, the robot's name. For example:4183_JuniorThe password will be
41834183note
This isn't intended for the wifi to be secure against hackers, but rather to prevent people from accidentally auto-connecting to it.
Open the project folder in VS Code
In the bottom left of the window, right click on
build.gradleand pressDeploy Robot Code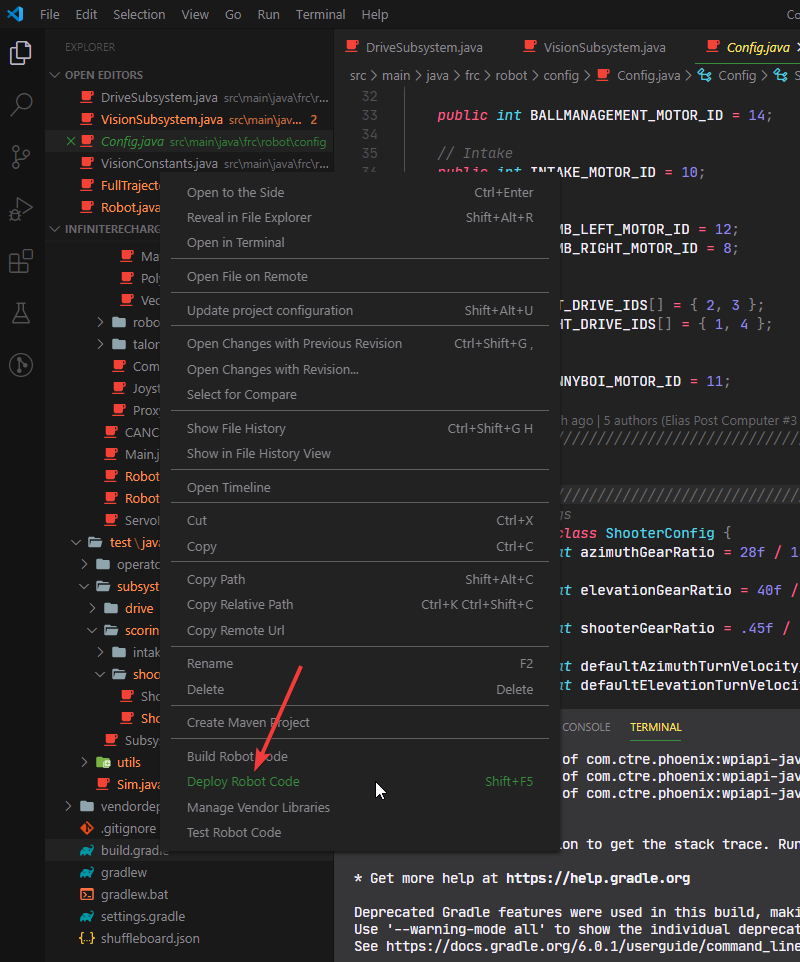 Note: your window may look a bit different than mine (colors, etc) since I have a custom theme enabled
K E Y B O A R D - S H O R T C U T S
Alternatively, press Shift + F5 on your keyboard
- If the build fails, it means either:
- you're not connected to the robot wifi
- your code doesn't compile Once you fix the issue, re-deploy. It should succeed.
Once it's deployed, then either open up "FRC Driver Station" or use the driver station laptop to test it.
There you go! Deploying code to the robot is a simple process, but one you will inevitably do multiple times